This page is a detailed tutorial showing how writers can use Evernote to capture and organize all their writing research.
If you’re not familiar with Evernote, here’s how they describe it at evernote.com:
Evernote makes it easy to remember things big and small from your notable life using your computer, phone, and the web.
What does this mean for a writer? It means you can capture everything you find online (full webpages or clips), as well as capture and tag your photos, notes, and audio notes. Whether at home or doing research on site, Evernote allows writers to gather, organize, and access all their research no matter where they are.
That’s big!
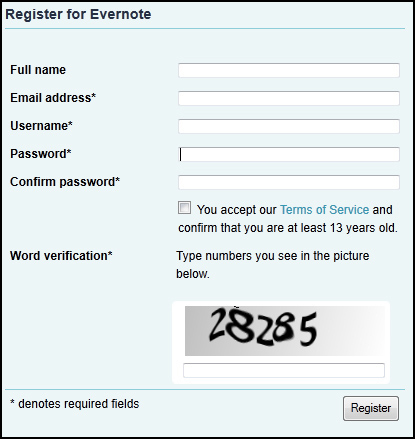
Creating an Evernote Account
Go to evernote.com.

Click “Create Account” near the upper right of the Evernote website.
Follow the windows and prompts to register for your Evernote account.
Downloading Evernote
There are three main components to Evernote:
- Evernote desktop
- Evernote Web Clipper
- Evernote app
How do all these parts work together. Again, straight from the Evernote site:
Evernote works by connecting all the computers and phones you use daily, allowing you to capture something in one place and then access it from another. All in Evernote.
Installing Evernote for Computers
Go to the Evernote download page (http://www.evernote.com/about/download/).
Click your desired download under “For Computers” under the “All Downloads” tab on the right side of the screen.
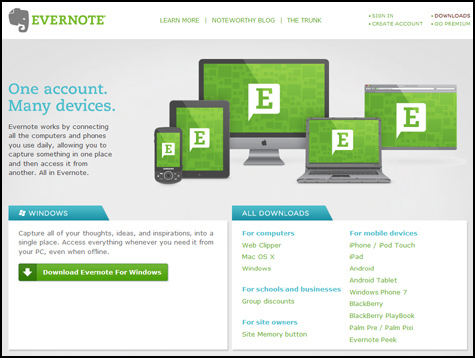
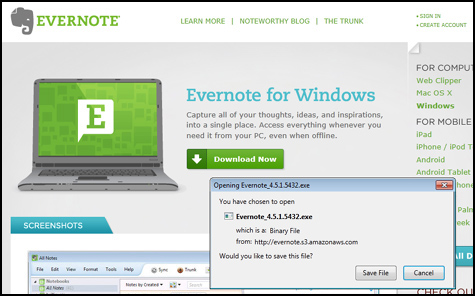
Result: The download for your computer type appears.
Follow the download prompts as you would any other application downloaded and installed from the Internet.
Installing Evernote Web Clipper
Click “Web Clipper” on the right sidebar after your download.
Note: You can also return to the Evernote download page and click “Web Clipper.”
Result: The Evernote Web Clipper browser extension page appears.
Click the Install link. (In this example, “Install Firefox extension.”
Follow the prompts to install.

Installing the Evernote Mobile App
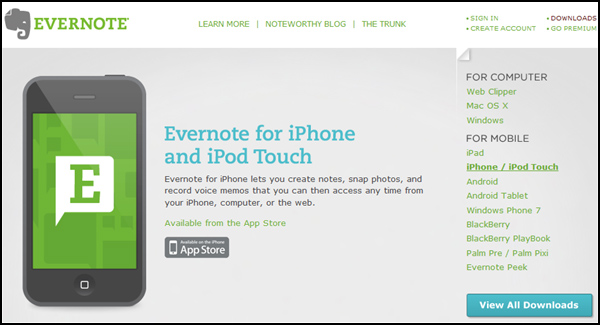
Click the desired mobile app download from the right sidebar.
Click the link for the download.
Follow the prompts to complete the download.
Note: Of course, you can install the Evernote app directly from your mobile device like any other app. Search for Evernote and install without the need to sync with the download from your computer.
After downloading Evernote and Evernote Web Clipper for your computer — and the Evernote app for your mobile device or tablet — you’re ready to start capturing and organizing all your research!
For this Example
If you haven’t watched the video above — for this tutorial — I’m pretending that I’m researching a cemetery in Aurora, Texas for a Halloween story.
In the late 1800s, a UFO allegedly crashed in Aurora, Texas, and the pilot of the alien craft is supposedly buried in the town cemetery.
That’s just begging for not just a zombie story, but an alien zombie story! (If the idea is your thing and you decide to write it, I want to see the story when you’re done!)

Creating Notebooks
Evernote Notebooks are where all content is stored.
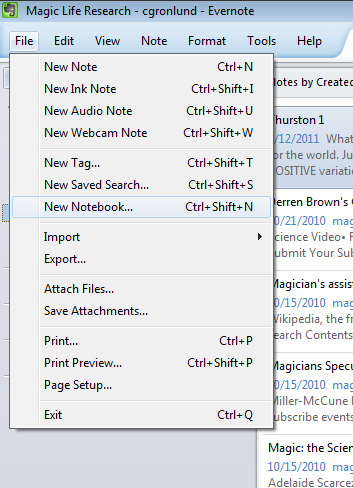
From Evernote on your computer, click “File” from the menu bar.
Select “New Notebook.”
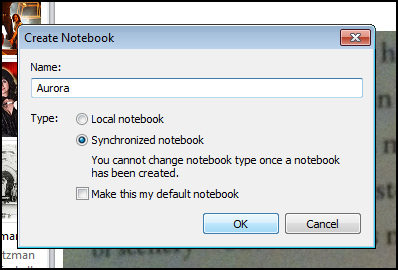
Result: The “Create Notebook” window appears.
Type the name of your new notebook. (Aurora in this example.)
Select the type of notebook.
Note: “Local notebook” is a notebook stored on your computer with content that is never transferred to Evernote’s secure servers. “Syncronized notebook” is the default selection because it allows you to capture information using Web Clipper and the Evernote mobile app and share the information across all devices (the most common use for Evernote).
Click the “OK” button.
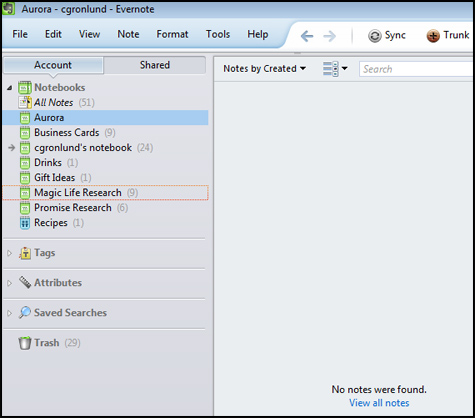
Result: The new notebook (Aurora) now appears in the notebooks list.
Web Clipping
Web Clipping allows you to save entire webpages, parts of webpages, or images for your research.
Sure, you can use a browser bookmark, but here’s something that happened to me several years ago: I found a great site for something I was writing. I bookmarked pages and when I was ready to sit down and write the book, the website owner took everything offline!
With Evernote, once you clip something, even if the website goes away, what you captured doesn’t. And, as long as the site is active, all the links from your clippings will work. All that, and you can carry all that information around in your pocket when you’re away from your desk and on a research site.
In this example, before I head out to the Aurora cemetery, I want to do some research before I go.
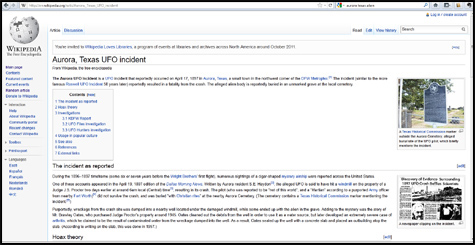
On Wikipedia, I go to the Aurora, Texas UFO Incident page. I want the whole page.
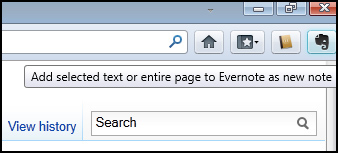
Click the elephant head icon in the upper right side of the browser.
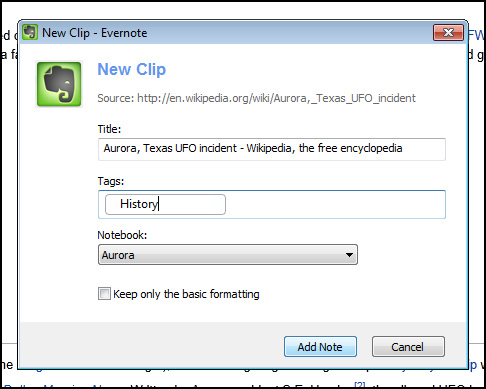
The New Clip window appears.
Here, you can tag the site for easy retrieval later, as well as designate which Notebook you would like the site to be saved to.
(In this example, I’m saving the site under my “History” tag, which will pull up anything I’ve tagged as “History” in any of my Notebooks. I’ve also told Evernote to send this Web clip to my Aurora Notebook.)
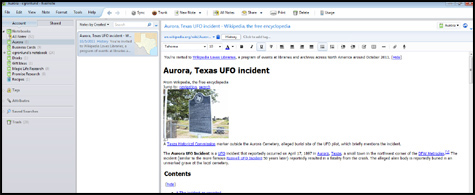
The clipped site is now in my Aurora folder when I go to Evernote for my computer (or mobile app).
Note: If the clipped site is not there, click the Sync button to the right of the menu bar.
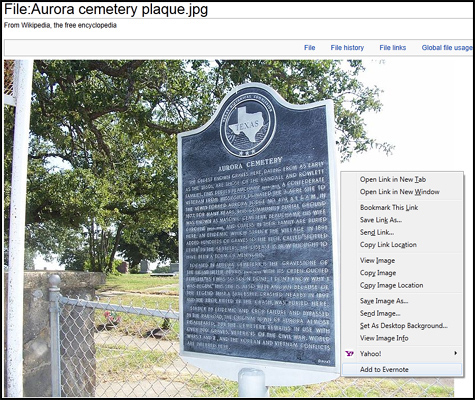
You can also clip just an image.
Right-click on the image, and at the bottom of the list, click Add to Evernote.
The New Clip window appears.
Tag the photo if you want, and select the notebook where you want to view the image.
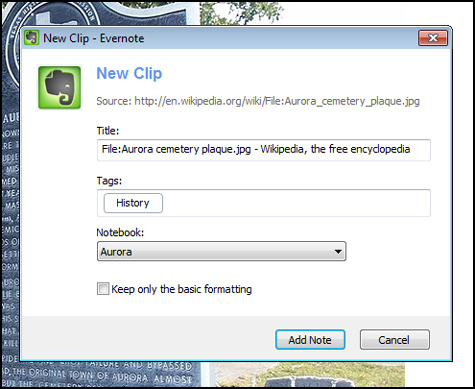
The clipped image is now in my Aurora folder when I go to Evernote for my computer (or mobile app).
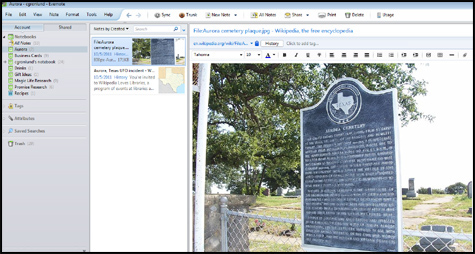
You can also highlight bits of text you want if you don’t need an entire webpage.
Once the text is selected, clip the elephant head icon in the upper right of the browser and tag and send the clipped text to the desired Notebook.
Working Remotely
Evernote is a powerful application, but where it really comes in handy for a writer is when capturing items remotely with your mobile device.
During my research, I find out the Aurora cemetery isn’t too far from where I live. So it’s time for a trip out west!

Taking Snapshots in Evernote
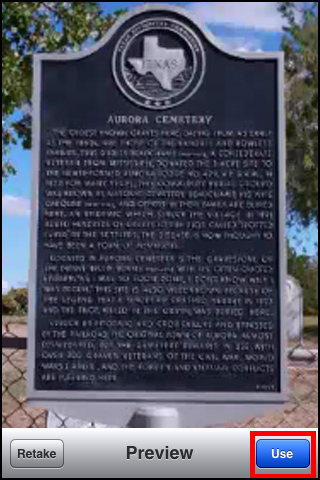
When I arrive at the cemetery, I’m greeted by a historical marker.
I want a photo of the marker, so I open the Evernote app on my phone and tap the plus symbol at the bottom.

Result: The capture options screen appears.
I tap the “Snapshot” button.
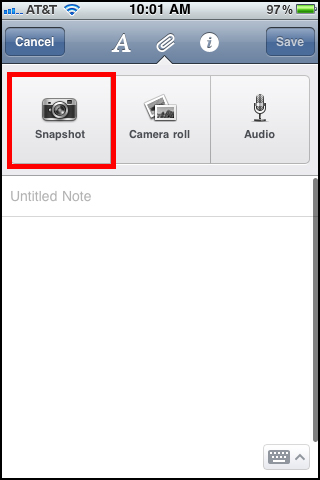
Result: My phone’s camera opens.
I line up my shot and take my photo.
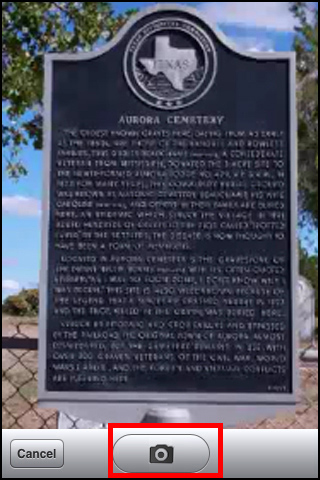
Result: The Preview screen appears.
Evernote gives the option to retake the photo of you’re not pleased with it, or use the photo if you are.
I’m pleased with my photo, so I tap the “Use” button.
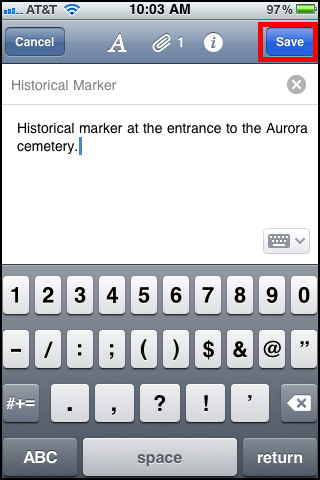
Result: The notes screen displays.
If I want, I can type a note to go with the photo.
When I’m done, I click the “Save” button.
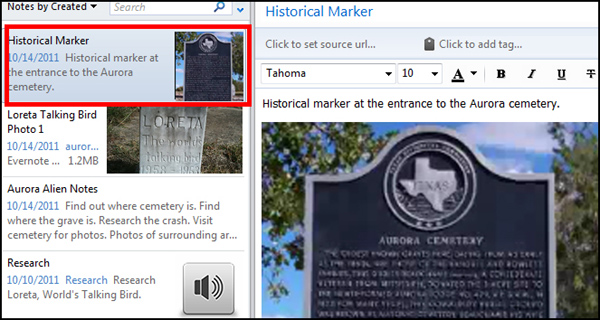
When I get home and sync, the photo is in Evernote on all my devices.
Importing Existing Photos into Evernote
If you’ve taken photos with your mobile device’s camera instead of using Evernote’s snapshot feature, you can still bring those photos into Evernote.
Launch Evernote on your mobile device and tap the “+” symbol.
Result: The Evernote options screen appears.
Tap the Camera Roll button.
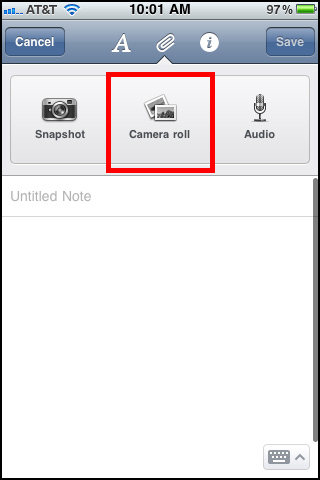
Result: Your mobile device’s camera roll appears.
Select the desired photo.
Result: The Evernote app notes screen appears.
Type your note and save.
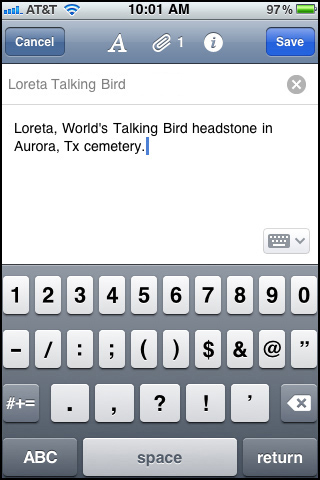
Since I didn’t specify which notebook I wanted to store the photo in, when I get home and sync, the photo is in my main notebook.
Moving the photo to the Aurora notebook is easy.
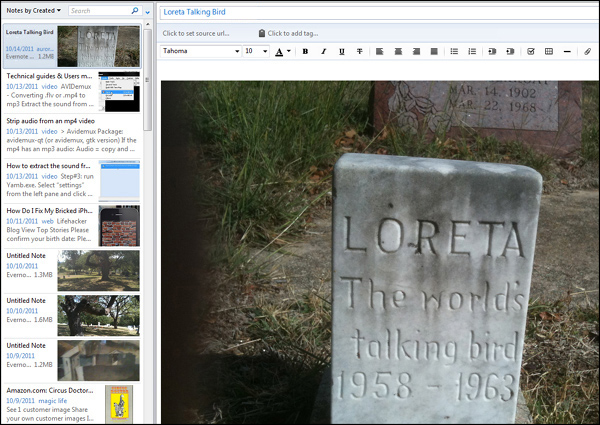
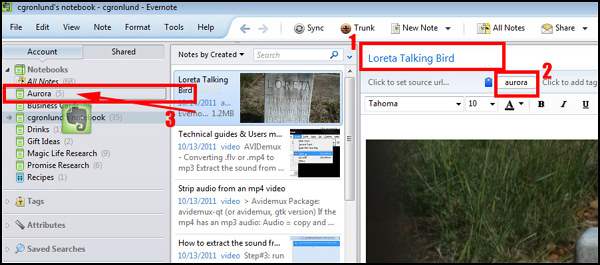
If you didn’t name the photo and tag it, you can do that now (steps 1 and 2 in the image below).
Then, click and drag the photo to the Aurora notebook.
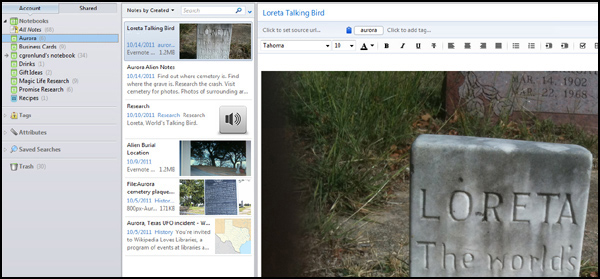
The photo is now stored in the Aurora notebook.
Creating Evernote Audio Notes
Sometimes when you’re out doing research, it’s easier making an audio note than trying to type a note on your mobile device.
Typing on a mobile device like a phone can take time…

Creating an audio note in Evernote is much faster, depending on how detailed your note needs to be.
To create an audio note, launch Evernote on your mobile device.
Tap the “+” symbol.
Result: The Evernote app options screen appears.
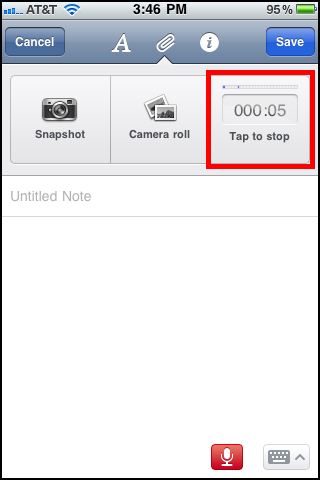
Tap the “Audio” button.
Record your message.

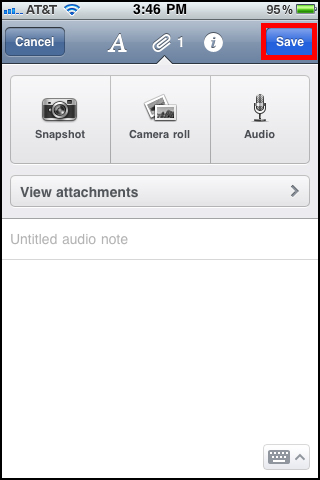
Tap the “Tap to stop” button to stop recording the audio note and save.
Note: Before saving, you also have the option to tag and make notes about the audio note if desired.
Playing Evernote Audio Notes
To play your audio note, sync Evernote on your computer.
Click the desired note in the Aurora notes list.
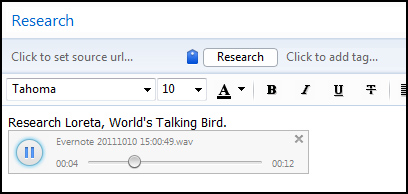
Result: The audio note displays in the main window.
Click the play button.

Result: The audio note plays.
Learn More about Evernote
For a behind-the-scenes look at Evernote’s cloud elephants that make all the magic happen, watch the video below.
For more cool Evernote tutorials (trust me, it does a lot more), check out Evernote’s video page.
